Quest Pro
The Meta Quest Pro provides eye gaze tracking, detailed eye expression tracking, and face tracking. All eye and face tracking hardware is internal to the device (no additional hardware setup required). All eye and face tracking data is accessed via Meta's Face and Eye OpenXR extensions. There is currently no way for VRCFT to simultaneously extract data from the headset and send eye and face tracking to the Quest version of VRChat, so the following solutions are only for PCVR. Previously, a beta version of the native VRChat Quest client included built in eye tracking support without the need for VRCFaceTracking. This version is discontinued and is no longer available.
The Quest Pro face tracking is susceptible to moisture damage. Learn more
Why is this setup required?
The Quest Pro provides developers with both eye and face tracking data from a single, contained device, making it easy for native Quest developers to incorporate. However, having it only accessible through Meta's Oculus OpenXR extensions means there must be an OpenXR application using the Oculus runtime running somewhere. Difficulty of the setup process depends on the desired PCVR connection method.
Setup
The basic Quest Pro setup flow:
- Enable Eye and Face Tracking on the Headset
- Complete set-up for desired PCVR connection method
- Install corresponding VRCFT module for your PCVR method
1️ Enable Eye and Face Tracking on the Headset
- Open up the Settings in your Quest Pro headset, and navigate to "Movement Settings"
- Select the "Natural Facial Expressions" tab on the left, then Enable Natural Facial Expressions
- Select the "Eye Tracking" tab on the left, then Enable Eye Tracking. If you haven't already, calibrate your eye tracking

2️+3️ PCVR Method-specific Setup
The Quest Pro currently has 4 face-tracking compatible PCVR connection methods, listed below in no particular order:
- Virtual Desktop
- ALVR
- SteamLink
- ALXR
If you need a recommendation for what to use for PCVR streaming:
- If you don't want to spend money and want to connect wirelessly: you should try SteamLink as it has the easiest and most straightfoward setup.
- If you don't mind spending money: you should try Virtual Desktop for performance and additional features.
- If you want to tinker in-depth with your PCVR stream and don't mind some rough edges: try ALVR or it's fork ALXR, which are open-source PCVR streamers.
With any option, the user is expected to have the VR PC and the Quest Pro on the same network, with the PC ideally connected to the network via ethernet cable (for wireless PCVR), or Quest Pro connected to the PC with a high-quality USB 3.0+ cable if using USB streaming with Meta Quest Link or ALVR/ALXR. You can learn more about improving your Quest PCVR streaming experience with the numerous guides available online.
Click the card below for setup instructions for your chosen PCVR connection method, in addition to what VRCFT module to install.

📄️ ALVR
ALVR (Air-Light VR) is an open-source PCVR streamer compatible with many standalone devices.

📄️ ALXR
ALXR is a fork of the open-source ALVR with an emphasis on OpenXR features.

📄️ SteamLink
SteamLink is Valve's free PCVR steaming solution specifically meant for using Quest VR headsets with SteamVR.
📄️ Virtual Desktop
Virtual Desktop is a PCVR streamer app purchasable from the Quest store that provides many features, including but not limited to streaming facetracking data from the Quest Pro.
Tips and Tricks
The follow are various potentially useful tips for using the Quest Pro that apply for any PCVR method.
Using Sidequest to Side-load Quest Apps
- Install SideQuest (Advanced Installer) on your computer
- The SideQuest application will have a built-in tutorial for the following steps.
- Connect your Quest Pro headset to your computer with a data-transfer USB cable. Once connected you will be prompted to "Allow USB debugging" and "Allow File Access". Make sure to allow both. (You should also check the Always allow from this computer box to prevent the message from popping up again later)
- Use SideQuest to install
alxr-client-quest.apk(or whatever other application you want) to your Quest Pro. Click the "Install APK file from folder" button, then select the desired.apkfile in the file prompt.
- SideQuest should have a green notification bar show up at the bottom saying the operation was successful.
You may need to uninstall the previous version of the app you are trying to sideload if it exists and SideQuest fails the current app install.
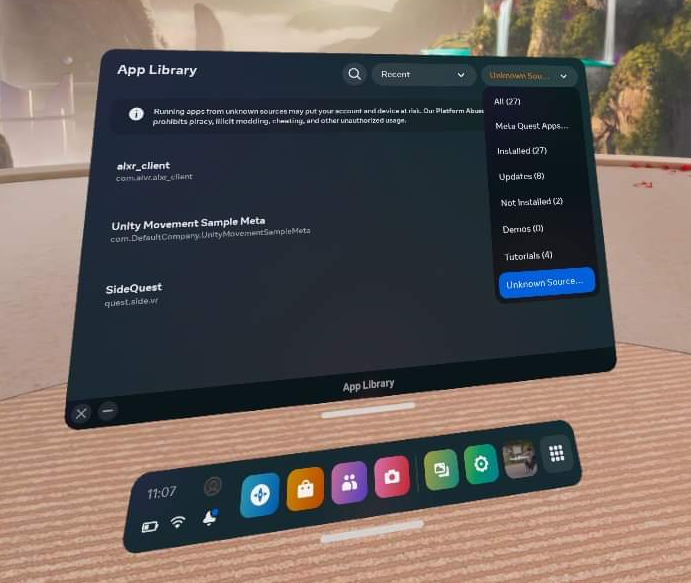
- In your Apps Library, you will need to set the category of shown apps to "Unknown Sources" to see the sideloaded application. You will need to tap the Search bar first before you see the category filter dropdown.
Aligning Play Spaces with SteamVR Lighthouse-tracked Devices
To use Vive trackers or other SteamVR Lighthouse tracked devices with the Quest Pro, you'll need to use OpenVR-SpaceCalibrator. While the original from pushrax will work, many "Mixed VR" users have found the continous calibration forks to be better:
- bdunderscore's OVRSC fork
- ArcticFox8515's OVRSC fork of bdunderscore's fork
- Recommended option: Hekky's OVRSC fork, which comes with important performance fixes for continuous calibration
Using Network-Only Streamers with a Wire
TODO
My playspace calibration resets if I take off the headset
| Cause | When the Quest headset enters sleep mode after detecting you have taken off the headset, it loses it's original reference space to which the SteamVR space was calibrated to. |
| Solution | Download the Meta Quest Developer Hub and follow the instructions for Connect Headset to MQDH and Disable proximity sensor and guardian. This will prevent the headset from entering sleep, but does mean your headset stays fully active even if you take it off. Alternatively, use another PCVR streaming method that supports Stage Tracking (Virtual Desktop, ALXR, ALVR, SteamLink) and enable Stage Tracking. |
Having issues that you can't find a solution to? Check the Troubleshooting section on the setup page for your PCVR streamer, and also the #hardware-software-help forum in the VRCFT Discord.